This is the last month for my craft along I hosted this year. I can't say it was a huge success so I won't be hosting again. I did manage to do everything though so I am happy about that.
Here is the last theme for the year.....
It's A Wrap!
Simply put, make a "wrap" for yourself or a friend.....it can be something to keep you warm, like a scarf. It can be anything that WRAPS.....if you make cute holiday gift wrap, etc....that counts!
Enjoy and have a great month!
Showing posts with label December. Show all posts
Showing posts with label December. Show all posts
Sunday, December 6, 2015

Sunday, December 11, 2011
Peppermint Pixie!
Today I watched the Saints game and made my peppermint pixie.
She turned out SO CUTE!

now I need to make my candy cane syrup. After that, I'll be done with this year's YOE......amazing that another year is almost done!
She turned out SO CUTE!

now I need to make my candy cane syrup. After that, I'll be done with this year's YOE......amazing that another year is almost done!
Wednesday, December 7, 2011
Peppermint Pixies!
I found this recipe off foodbuzz.com and couldn't resist sharing it here given our theme.
Peppermint Pixies
 Maybe it's the season, weather or just something in the air but lately I've been having a peppermint craving, the more intense the better it is. Since it's Christmas, I decided to make an ordinary chocolate cookie a little extra ordinary so that's how these peppermint pixies came to existence.
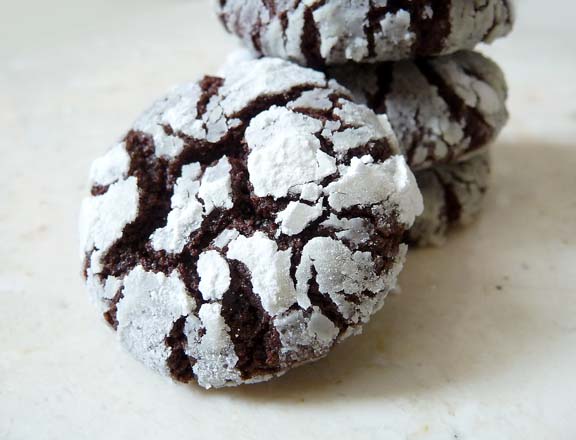 Commonly called chocolate crackles, chocolate crinkles and chocolate snowcaps, these cookies are delicious and bursting with chocolate flavour all on their own. The addition of creme de menthe and peppermint oil elevates them to another dimension and makes them seasonally special. As a child I recall fairy tales which often portrayed pixies as short and ill tempered little creatures. Therefore it would only be fitting to call these peppermint pixies because although they are tiny, they pack an intense mighty minty punch!
 Fresh and cooled after baking, they are crisp on the outside and chewy on the inside. They will be chewy after a day. These are a simple roll and bake cookie. You may already have your own recipe if not enjoy the one below.
Peppermint Pixies
yields about 2 dozen
Ingredients
6 oz Bittersweet Chocolate
1/2 teaspoon Peppermint oil
1/4 cup Cocoa Powder
3/4 cup AP Flour
1 teaspoon baking powder
1/8 teaspoon salt
4 tablespoons butter
3/4C Light Brown Sugar - packed firmly
1 large egg
2 tablespoons milk
2 tablespoons creme de menthe (optional - omit for child friendly morsels)
Granulated and icing sugar for rolling - about 1 cup each
Method
- Chop chocolate into small pieces and melt over a bain marie. Set aside to cool.
- Sift dry ingredients together; Cocoa powder, AP flour, baking powder and salt.
- Cream together butter and sugar until mixture is light and fluffy. Add in egg and beat until just combined. Stir in peppermint oil to cooled chocolate and add to butter mixture. Beat until well combined.
- Add half of sifted dry ingredients and mix on low until just combined. Add in milk and creme de menthe if using and continue to mix on low speed. Finally add in remaining dry ingredients and mix until just combined.
- Portion dough in two and between parchment paper press each portion into a square about 3/4 inch thick. Place in refrigerator and chill for at least 2 hours.
- When ready to form balls. Pop the chilled dough into the freezer for about 7-10 minutes. While waiting, prepare the icing sugar and granulated sugar separately in a medium sized bowl for rolling.
- Remove dough from the freezer, using a knife cut dough into 3/4 inch squares. Since I find the dough to be of a sticky and wet consistency, I found that this method of working the dough as cold as possible helps alleviate the sticky situation.
- Between the palm of your hands, roll each square into round balls which will be roughly 1 inch in diameter. As you are rolling, the warmth of your palms will start to melt the dough which is what you want as this will make the granulated sugar stick to them.
- Chuck the balls into the bowl with the granulated sugar and swirl them around to be completely coated. Pick them out and set aside. Do this to all the remaining dough. You may have to wash your hands between rolling but I found for myself that working the dough in 2 portions only required my hands to be washed before getting to the 2nd final half.
- After all the balls are formed and covered in granulated sugar. Preheat oven to 350˚. Roll the chocolate balls in icing sugar to generously coat them. Don't be skimpy here as this is what will create the black and white contrast of the cookies.
- Place the icing sugared balls onto parchment lined cookie sheets about 2 inches apart and bake 10-12 minutes until they puff and crack. Keep in a tightly sealed container for up to a week.

It may appear that there are many steps but don't let this deter you from attempting this recipe. It's all about ease and efficiency and being organized. You'll understand the messy and sticky situation when you start or attempt this recipe. It really is easy if you are organized and have everything ready.

Saturday, November 26, 2011
December's theme!!!!!!!!!

Each year I am drawn to peppermint candy canes like a moth to the flame.
There is something magical about a simple candy that can evoke such fond memories of childhood.
December's ornament: Using mainly red and white, create a "Peppermint Pixie!"
December's challenge: ship it out ASAP!
December's activity: make candy cane syrup this year!
Here is a link to the recipe I found at storybook woods. Isn't it pretty!

"All you need is faith and trust and pixie dust!" --Peter Pan
Wednesday, January 5, 2011
December package from Niki
Niki's elf package to me came in the mail today. She was my partner in December but hurt her arm and couldn't create anything. She sent me some fun traveling gnome fabric in place of an ornament.
I'm thinking it will be turned into a travel bag (appropriate?....) or a tote bag.

and since gnomes never travel alone, she included some other goodies too:
a couple teeny spools of ribbon, some scraping stuff, a FQ of pretty fabric, some post it notes and a wee flashlite....oh, and chocolates.....yum!

Thanks Niki!
I'm thinking it will be turned into a travel bag (appropriate?....) or a tote bag.

and since gnomes never travel alone, she included some other goodies too:
a couple teeny spools of ribbon, some scraping stuff, a FQ of pretty fabric, some post it notes and a wee flashlite....oh, and chocolates.....yum!

Thanks Niki!
Friday, December 31, 2010
December sent
 Here's the silly Elf package I sent to Ramie ... that red thing is supposed to be an elf bootie but I think that was a stretch!
Wednesday, December 22, 2010
Happy Mail Day!!
I have been having an amazing mail week this week. I love when packages arrive and no bills. Among some other things I ordered, I received a wonderful package from Gin.

I opened the box to find this big bag.

When I started emptying it I found a holiday pillow...

A cute card and glitter nail files...

an adorable hand towel. It must be towel week because a blog friend also sent me a hand/kitchen towel.

I love snowmen and jingle bells so this guy was perfect. He's so cute.

Love this elf. His eyes are mesmerizing...

Gin also included this wonderful tin which held...

this cute guy! I think I might use the tin to hold my tiny hexagons that I am hand sewing.
Gin thank you so much for everything. I love it all!!

I opened the box to find this big bag.

When I started emptying it I found a holiday pillow...

A cute card and glitter nail files...

an adorable hand towel. It must be towel week because a blog friend also sent me a hand/kitchen towel.

I love snowmen and jingle bells so this guy was perfect. He's so cute.

Love this elf. His eyes are mesmerizing...

Gin also included this wonderful tin which held...

this cute guy! I think I might use the tin to hold my tiny hexagons that I am hand sewing.
Gin thank you so much for everything. I love it all!!
Friday, December 3, 2010
Elf tutorials and ideas
Check out this tutorial from busylittleelf:

look at this redwork pattern! It is free at allsorts.


this one is from craft elf

and look here for these cute paper doll elves
 |  |  |
chickpeastudio has these elves that you can make smaller...she has a tutorial!!!

and these are found at hubpages...

and flickr has a whole page to check out here
craftgossip has these....again, you'd have to improvise but aren't they cute!


thelongthread shares a tutorial for this ornament but with a change of colors, Santa turns into an elf! She has some AMAZING things on her blog...go stalk around a bit!
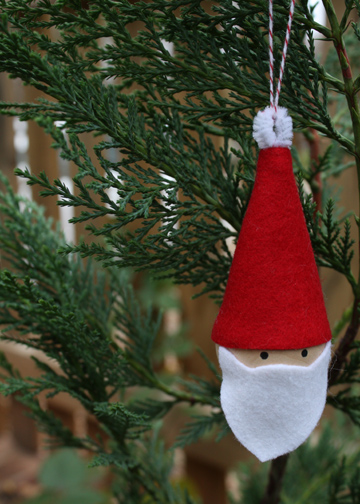
princessnimblethimble has wonderful bendy doll elves...and shares a tutorial on flickr

and this most adorable knit elf is at spud&chloe. I do wish I knit sometimes!
 and a crocheted one too....pattern is for sale...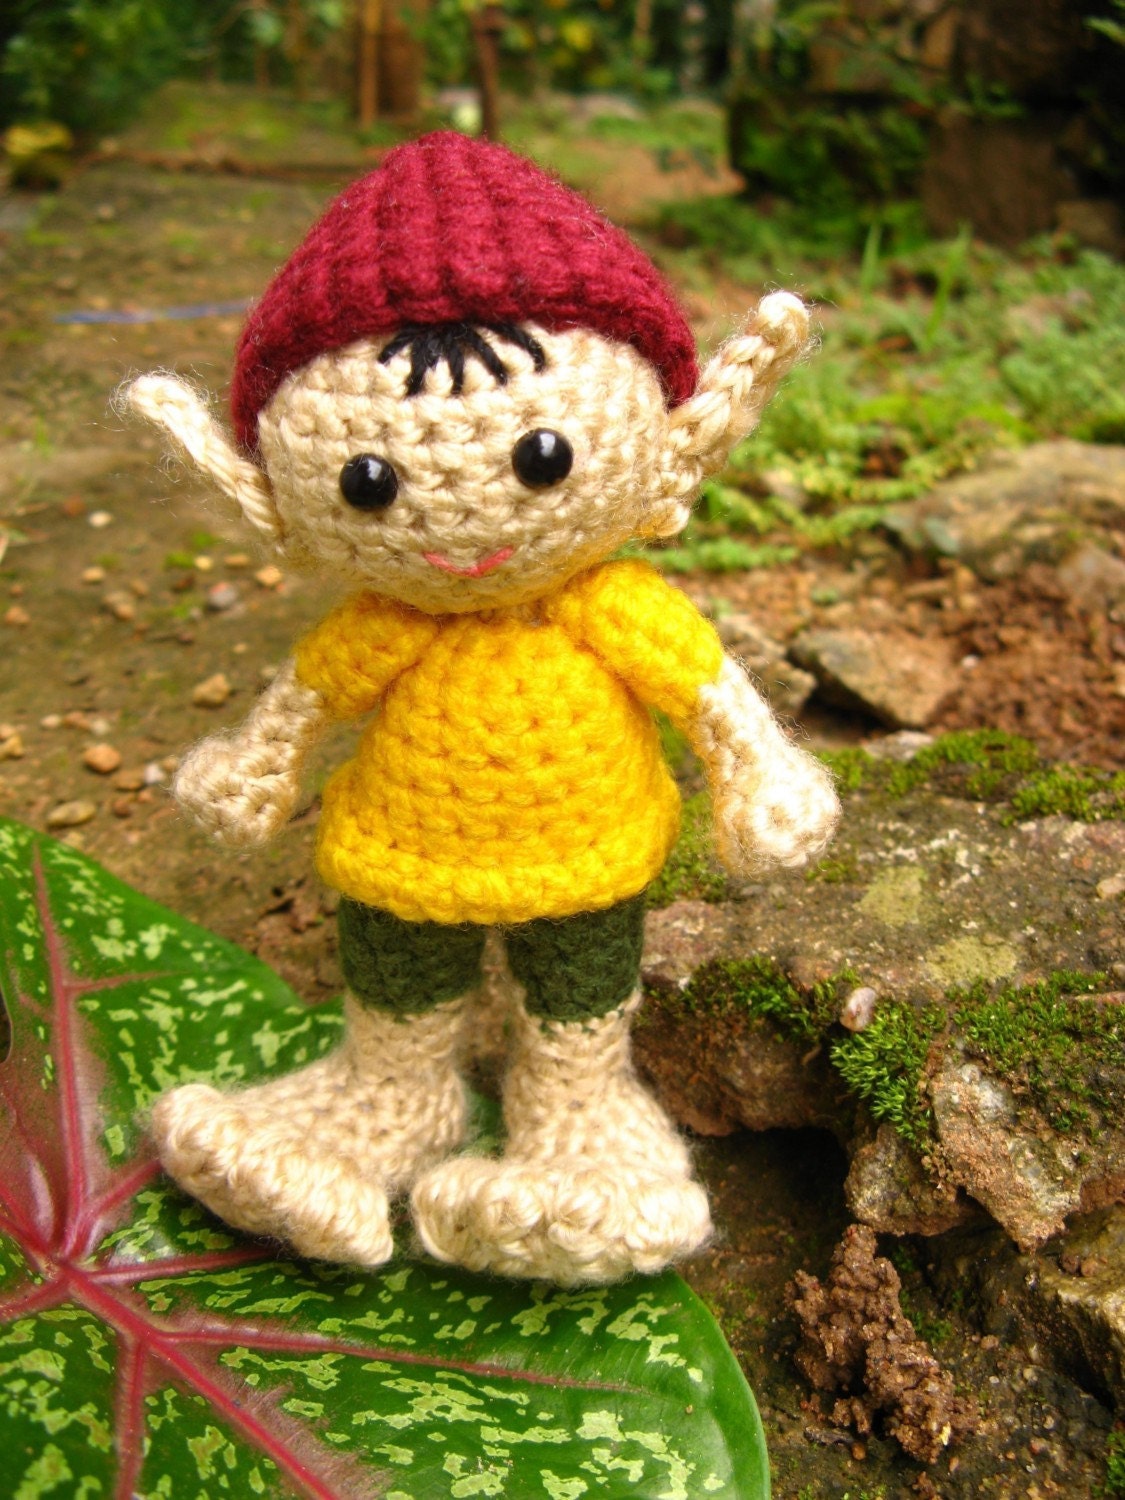
I hope these give you some ideas!
Tuesday, November 30, 2010
December!
"So, who helps Santa with all his toys?The sprightly little elf is definitely one of the most well known enchanted creatures around...and many are quite naughty!
Who wakes the fairies with all their noise?
Who has cute shoes that turn up at the toes?
Who makes you smile, regardless of woes?"
December's ornament: Elf
December challenge: slow down long enough to make an enchanted ornament for yourself.
December's activity: Random Act of Kindness: tie a dollar bill to a candy cane and lay it on a strangers desk at work.
Or buy the person behind you in the drive thru their morning latte.....
 Remember to mail your ornaments out earlier than usual this month.
Subscribe to:
Posts (Atom)