I kind of took pictures of the steps because I thought it might help someone if you ever wanted to try using
polymer clay for a doll.

Here is Zombie Rabids polymer clay parts. I used pink clay, not white because I had no white. It is going to change anyway. I love his funny teeth and eyes. So you have his head with a neck, his hands and his feet plus a pocket watch. Anything that needs to be stuck in the body I put in a floral wire stem. I used two little beads stuck in sideways. I baked this at 240 degrees for and hour then shut the oven off leaving the pan in the oven to cool.....the packages of clay call for way less time, but then the pieces are soft.

Here is the body all ready to go......(This is how I did Malice too.) First I cut off part of a leg of panty hose for the body and I stuff it. Then I tie off the top and botton and I have a body. To make the clothes I use a hot glue gun and a sewing machine. I covered the body with the small black and white stripe and glued it in place.
For the vest I cut two triangle and pressed the edges and then sewed them. Then they went on with hot glue as did the buttons, and the chain with key.
The jacket I just randomly cut out three pieces and sewed the hems first then sewed the side and sleeve sides.
The pants I cut out two pieces and sewing the crotch pieces and then straight up and around the leg. Then I stuffed the pants. I always use the eraser side of a pencil to stuff. It doesn't pierce the fabric that way if you really need to get it stuffed heavily.
at the waist leave room so you can stuff the lower part of the body into the pants then hot glue the pants onto the body where they touch.
Glue some trim to hide where the body and pants meet.
Glue the jacket sides down.
The body is ready freddy.
After the clay pieces were dry I just used my finger and some Halloween makeup and went over the pieces. Then I used a high gloss topcoat.
When that was dry I worked the head, the hands and the feet into the stuffed body. Once I had the hole made I put hot glue on the floral wire.
Last step, glue a ruff around his neck.
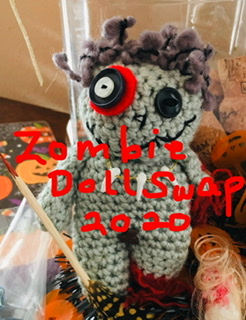
Meet Rabid the Zombie

Rabid the the Rabbit wanders the hall.
Chasing his victims he hopes they fall.
With his shuffling gait and rotten face
no one would say he moves with grace.
He wants to eat you, he really does.
Because what you were, you now are what was.


6 comments:
Thanks for the tutorial! I love Mr. Rabid.........
Very awesome .... thanks for sharing how you make him :-) Quick question - when you mold his head, do you do it over a ball of tin foil, or is it a ball of solid clay ?
Very cool!! I love his outfit!!!!
xoxoxo
not it is solid polymer. his head with neck took just under half a package. It also is pretty light.
Love his name, the way he looks and the poem. Your so crafty!
Chris=]
Thanks for the tutorial. He turned out great!
Post a Comment